Overview
Physical labels connect your digital asset records to real equipment. Each asset gets a unique barcode (and optionally a QR code) that staff scan with the Asset Scanner. Without printed labels, field teams rely on manual search – slow and error-prone during audits.
This chapter walks you through preparing barcodes, printing labels, and attaching tags to equipment in a consistent way.
How It Works
When you create an asset, the system can assign a Barcode automatically or you enter one manually following your naming standard. QR code generation can be enabled in Settings so labels include scannable codes linked to the asset record.
Print labels using Odoo’s standard label printing flow or your company’s label printer integration. Affix labels in a visible, durable location on each piece of equipment – bottom of laptops, side panel of machinery, etc.
Step-by-Step Guide
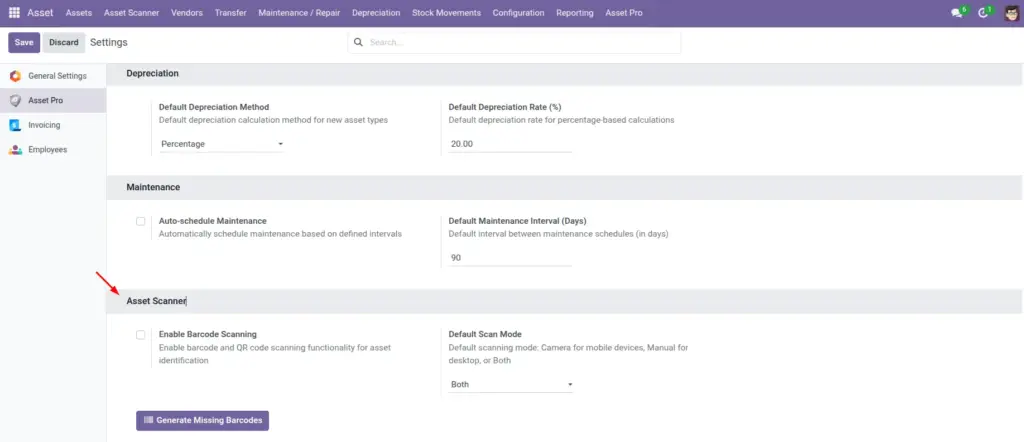
- Enable barcode and QR features at Asset Pro > Configuration > Settings > Scanner.
- Open the asset record and confirm the Barcode field is filled (e.g., ASSET-LAP-042).
- From the asset list, select one or more assets and use the print action to generate labels.
- Choose your label format (compatible with your Zebra, Dymo, or office printer setup).
- Print a test label first – verify the barcode scans correctly in Asset Scanner.
- Affix the label to the physical asset in a consistent location across your fleet.
- During audits, scan each label to confirm location and status match the system.
Fields Table
| Field Name | Description | Example |
|---|---|---|
Barcode |
Unique code printed on the physical label. |
ASSET-LAP-042 |
Asset Name |
Human-readable name shown on some label templates. |
Dell Latitude 5540 |
Asset Type |
Category printed for quick visual sorting. |
IT Equipment |
QR Code |
Scannable image encoding the asset reference. |
QR linked to ASSET-LAP-042 |
Company |
Optional on label for multi-company fleets. |
Acme Corp |
Location |
Optional – update after moves; label may show home location only. |
HQ Floor 2 |
Enable Barcode Scanning |
System setting to activate scanner features. |
Enabled |
Enable QR Code Generation |
System setting to create QR images for labels. |
Enabled |
Field Explanations
Barcode
Use a consistent format like ASSET-TYPE-NUMBER. Never duplicate barcodes across assets.
Asset Name
Keep label text short – long names truncate on small stickers.
Asset Type
Helps warehouse staff sort returned items without scanning every unit.
QR Code
QR codes work well on mobile devices; barcodes work with dedicated scanners. Enable both if mixed teams.
Company
Include on labels when the same asset types exist in multiple subsidiaries.
Location
Labels usually omit location because assets move – rely on scanning for current location.
Enable Barcode Scanning
Must be ON for Asset Scanner to accept barcode input.
Enable QR Code Generation
Turn ON before bulk printing so QR images appear on label templates.
Tips (Pro Tips)
- Print labels for all new assets on the day they arrive – before they leave receiving.
- Use durable polyester labels for equipment exposed to heat, oil, or outdoor conditions.
- Keep a master list of barcode prefixes by department (LAP-, VEH-, TOOL-) for easy identification.
- Test-scan every new label batch before affixing hundreds at once.
Common Mistakes
- Changing barcodes after labels are printed without reprinting – old tags point to wrong or empty records.
- Using generic barcodes from the product catalog instead of unique asset-level codes.
- Placing labels where they will be covered by cases, mounts, or paint.
- Skipping the test scan – misaligned printers produce unreadable barcodes.
Visual Reference