Schedule inspections, record findings, and keep checklists.
Overview
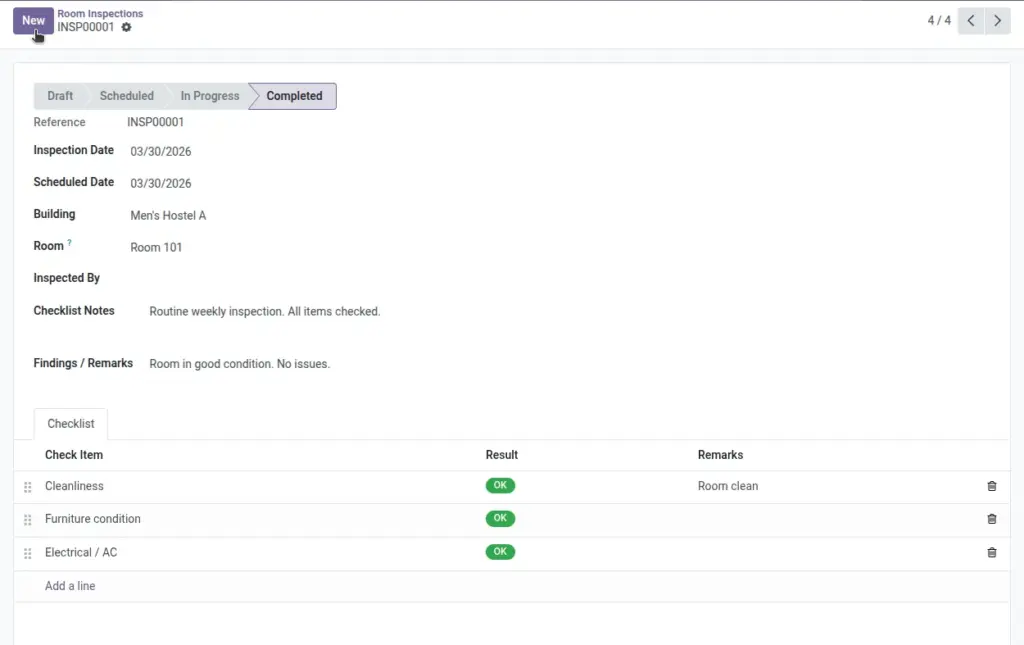
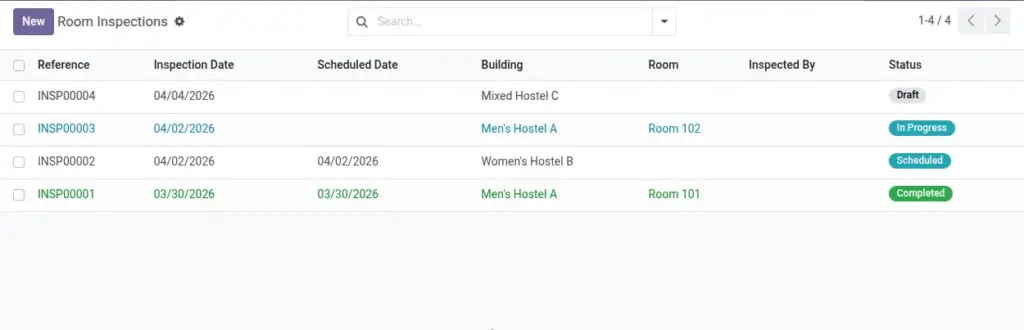
Room Inspections standardize cleanliness and safety checks. Plan by building or specific rooms, use repeatable checklists, capture findings, and trigger follow‑ups—reducing disputes and improving turnaround quality.
- Coverage: Building‑wide sweeps or targeted room checks.
- Consistency: Reusable checklists ensure the same standards across staff.
- Follow‑through: Findings can lead to maintenance requests or penalties when appropriate.
How It Works
- Use Scheduled/In Progress/Completed to track progress.
- Auto‑scheduling can be enabled with a default frequency.
Step‑by‑Step Guide
- Go to Control → Room Inspections → New.
- Choose Inspection Date, Building, and optional Room.
- Add checklist lines and start/complete when done.
Fields Table
| Field Name | Description | Example |
|---|---|---|
Reference |
Auto number |
INSP/2026/0011 |
Inspection / Scheduled Date |
Dates |
10‑Jun / 12‑Jun |
Building / Room |
Location |
North Wing / 201‑A |
Inspected By |
Employee |
Housekeeper |
Status |
Draft/Scheduled/In Progress/Completed |
Scheduled |
Checklist |
Lines with results |
Cleanliness: OK |
Findings |
Remarks |
Replace bulb |
Field name explanation : Enable auto‑scheduling in Settings to propose next inspections.
Fields explanation
- Reference: Auto number for traceability.
- Inspection / Scheduled Date: Actual vs planned timing.
- Building / Room: Scope of the inspection.
- Inspected By: Responsible employee or team member.
- Status: Draft/Scheduled/In Progress/Completed workflow.
- Checklist: Standardized items with per‑item results.
- Findings: Notes leading to maintenance or actions.
Tips
- Re‑use checklist items to keep inspections consistent.
Common Mistakes
- Starting without setting a schedule date may confuse teams.
Image