A complete beginner’s guide to install Access Control Studio in Odoo and open it for the first time – written for people who are new to adding apps.
Overview
Welcome. If this is your first time installing an Odoo add-on (extra app), this page walks you through every step in plain language.
What you are doing: you will place the Access Control Studio folder on your Odoo server, restart Odoo, activate the app, give yourself permission to use it, then confirm the menu appears.
Who should do this: usually your Odoo administrator or IT person. You need access to the server folders (or hosting panel) and an Odoo login that can install apps (often an Administrator / Settings user).
Time needed: about 15–30 minutes the first time, depending on your hosting.
Before you begin Work on a test / staging database first if you can. Take a backup before installing anything on a live (production) company database.
How It Works
Odoo only shows apps that live inside its addons folders. So the Access Control Studio folder must be copied there, then Odoo must be restarted so it notices the new files.
Next you turn on Developer Mode (also called Debug Mode) so you can refresh the list of available apps. Then you search for Access Control Studio and click Activate / Install.
If the database was created with demo data enabled, sample profiles may appear automatically after install. That is normal and helpful for learning.
Finally, Odoo does not always show a new app to every user. You must give yourself (or the right people) the Access Control Studio / Manager or Administrator permission, refresh the browser, and open the new menu.
Step-by-Step Guide
Step 1 – Download the latest copy of the add-on.
Get the newest Access Control Studio package from your vendor, Odoo Apps store, or project folder. Prefer a ZIP/folder that matches your Odoo version (this guide is for Odoo 18). After download, extract the ZIP if needed. You should see a folder named something like access_control_studio that contains files such as __manifest__.py. Keep only that module folder – not a nested “double folder” (avoid access_control_studio/access_control_studio/... mistakes when uploading).
Step 2 – Upload the add-on folder into Odoo’s addons (or custom_addons) path.
Copy the access_control_studio folder into the place where your Odoo reads extra apps. Common locations are:
- The main addons directory, or
- A custom_addons (or similar) folder that is already listed in your Odoo configuration (
addons_path).
If you use Odoo.sh, Docker, or a hosting panel, use that host’s file manager / deployment method to place the folder in the configured custom addons path. Ask your host or IT team if you are unsure where addons_path points. After copying, confirm the path looks like: .../custom_addons/access_control_studio/__manifest__.py.
Step 3 – Restart the Odoo service.
Odoo loads add-on files when the service starts. After uploading files, restart Odoo (service restart, container restart, or Odoo.sh rebuild/restart – whichever your setup uses). Do not skip this step. If you do not restart, the new app often will not appear even after you update the app list. Wait until Odoo is fully back online, then open your database in the browser and log in as an administrator.
Step 4 – Activate Developer Mode (Debug Mode) in Settings.
Log in to Odoo with a user who can open Settings.
Go to Settings. Scroll to the bottom of the Settings page and click Activate the developer mode (wording may be “Activate the developer mode” / Debug). You can also open a URL shaped like https://your-odoo-url/odoo?debug=1 on some setups.
When Developer Mode is on, you will see extra tools (often a small bug icon in the top bar). You need this so the next step – Update Apps List – is available.
Step 5 – Update the Apps list.
Open the Apps menu (main app switcher → Apps).
Click the menu (⋮ or “Favorites/Action” area depending on your UI) and choose Update Apps List. Confirm when asked.
Odoo rescans the addons folders and registers Access Control Studio so you can find it by name. If Update Apps List is missing, Developer Mode is probably still off – go back to Step 4.
Step 6 – Search for the add-on and activate (install) it.
Still in Apps, remove the default “Apps” search filter if it hides newly uploaded modules (clear filters so you can see all modules).
In the search bar, type Access Control Studio (or access_control_studio).
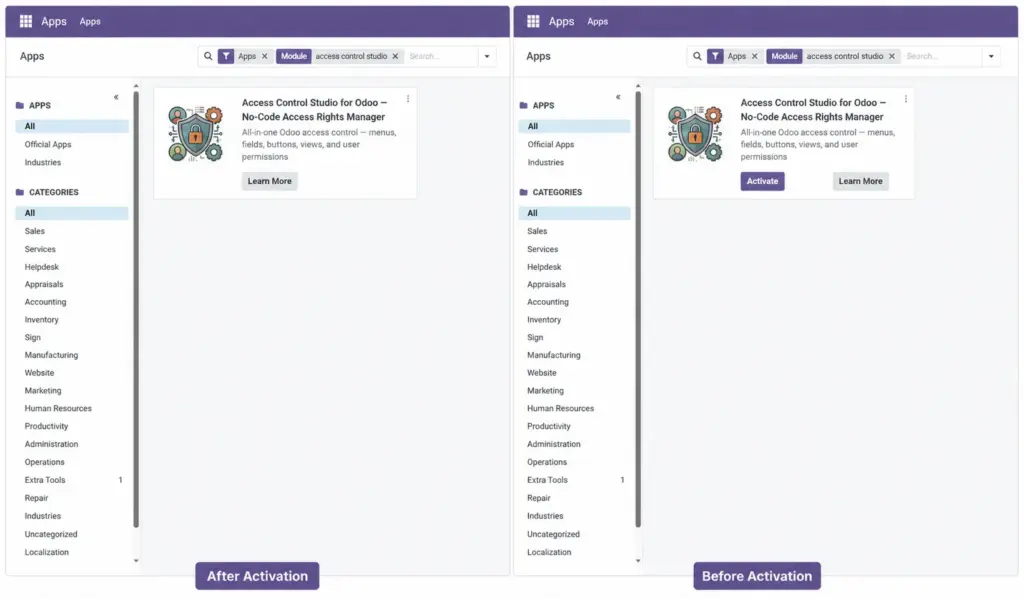
Open the app card and click Activate / Install. Wait until installation finishes with no error.
If the app does not appear, re-check Steps 2–5 (folder location, restart, developer mode, update apps list).
Step 7 – Demo data (if your database uses demo data).
If this Odoo database was created with demo data, Access Control Studio may automatically load sample / demo profiles after install. That is helpful for learning on a test database.
On a clean production database without demo data, you usually will not get those sample records – you create your own profiles instead. You may still see inactive starter templates (for ideas). Do not panic if the board looks mostly empty on a new live database.
Step 8 – Give user permission to use Access Control Studio.
Installing the app is not always enough for every login. Open Settings → Users & Companies → Users. Open your user (or the person who will manage access rules).
Find the access rights / application rights section and enable:
- Access Control Studio / Manager – to create and manage access profiles, or
- Access Control Studio / Administrator – full control (and ACS rules will not restrict this user).
Save the user. Repeat for any other colleagues who should configure the app. Ordinary sales or warehouse users do not need this permission – they only receive the limits you configure later.
Step 9 – Refresh Odoo and confirm the menu is visible.
Fully refresh the browser (or log out and log back in). Open the main Apps switcher (the grid / home icon).
You should now see Access Control Studio. Open it, then open Access Profiles. If you see the profiles board (cards or list), setup succeeded – you are ready to create your first profile.
If the menu is still missing, re-check Step 8 permissions, confirm you restarted after install, and try another browser refresh or a private/incognito window.
Fields Table
These are the settings you will see for this feature, explained in everyday language.
| Field Name | Description | Example |
|---|---|---|
Add-on / module folder |
The Access Control Studio package you download and place on the server. |
Folder named access_control_studio |
addons or custom_addons |
Server folder where Odoo looks for extra apps. |
…/custom_addons/access_control_studio |
Restart Odoo service |
Reload Odoo so new files are recognized. |
Restart service / container / Odoo.sh |
Developer Mode |
Extra Settings mode that unlocks Update Apps List and technical tools. |
Activate the developer mode |
Update Apps List |
Tells Odoo to rescan folders and find new modules. |
Apps → Update Apps List |
Activate / Install |
Installs Access Control Studio into your database. |
Apps → Access Control Studio → Activate |
Demo data |
Sample records loaded only when the database was created with demo data. |
Demo profiles on a test DB |
Access Control Studio / Manager |
Permission to open the app and manage profiles. |
Enable on your admin user |
Access Control Studio / Administrator |
Full ACS permission; not limited by ACS profiles. |
Trusted IT admin only |
Access Control Studio menu |
The app entry in the main Odoo app switcher after setup. |
Apps grid → Access Control Studio |
Access Profiles |
First screen inside the app where you manage rule packs. |
Kanban board of profiles |
Field Explanations
Each field from the table above is explained in more detail here.
Add-on / module folder
This is the product package. Always use a version built for your Odoo major version (18.0). Keep a backup copy of the ZIP you installed.
addons or custom_addons
If the folder is outside Odoo’s addons_path, Odoo will never see the app. Custom_addons is preferred so your extra apps stay separate from standard Odoo apps.
Restart Odoo service
File copy alone is not enough. Restarting is what makes new modules discoverable after upload.
Developer Mode
Safe for administrators during install. You can leave it on while configuring ACS; turn it off later if you prefer a simpler Settings screen.
Update Apps List
Without this, a freshly copied module often does not show in search. Run it once after every new module upload.
Activate / Install
This creates the app’s menus, security groups, and data inside your database. Wait for success before moving on.
Demo data
Useful for training. On production, expect an empty or template-only board and create real profiles for your teams.
Access Control Studio / Manager
Required for people who will design access rules. Without it, the facility menu may be hidden even after install.
Access Control Studio / Administrator
Stronger role for system admins. Use carefully – this role is exempt from ACS restrictions.
Access Control Studio menu
Your proof that Steps 1–9 worked. If missing, permissions or refresh are the usual causes.
Access Profiles
After setup, this is where daily work begins: create profiles, assign users/groups, and configure rules.
Tips
- Write down your addons path and who performed the install – future updates will be easier.
- Install on a test database first, practice creating one profile, then repeat on production.
- After install, continue with Getting Started and Managers & Administrators before building complex rules.
- If your vendor sent both a module folder and documentation, keep them together in one project folder.
- When updating to a newer ACS version later, replace the folder, restart Odoo, then upgrade the app from the Apps list.
Common mistakes
- Uploading the ZIP without extracting it – Odoo needs the folder with __manifest__.py, not a .zip sitting in addons.
- Creating a nested folder by mistake (access_control_studio inside another access_control_studio) so Odoo cannot find the manifest.
- Forgetting to restart Odoo after copying files.
- Searching in Apps without Update Apps List (and without Developer Mode).
- Leaving the default Apps filter on, so the newly uploaded module stays hidden in search.
- Installing successfully but never giving Manager/Administrator rights – then wondering why the menu is missing.
- Expecting demo profiles on a production database that was created without demo data.
- Giving ACS Administrator to every user “so they can see the menu” – only configurators need ACS rights.
Image