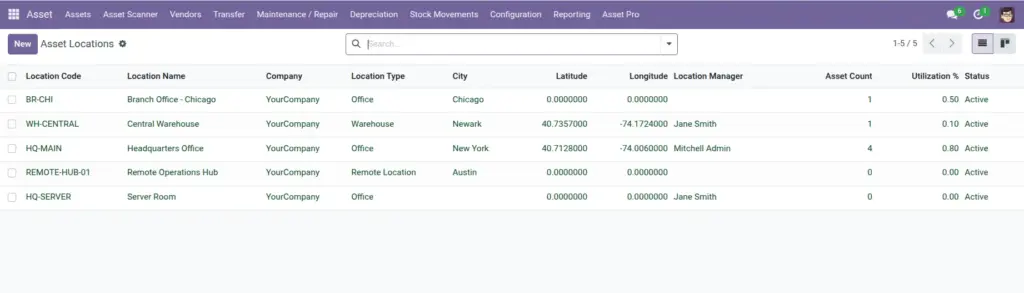
Overview
Asset Locations tell you where every asset physically lives – headquarters, a warehouse, a retail store, or a remote office. You can build a hierarchy (Region > Building > Floor > Room) and set capacity limits so a storage room cannot hold more equipment than it should.
This is essential for audits, insurance claims, and day-to-day questions like “Where is the projector for the Chicago meeting?”
How It Works
Each location belongs to one company and can have a parent location (e.g., “Floor 3” under “HQ Building”). When you assign an asset to a location, the system checks capacity rules and allowed asset types automatically.
Location managers can be assigned per site. The system tracks how many assets are currently at each location and warns you when capacity is nearly full.
Step-by-Step Guide
- Go to Asset Pro > Configuration > Asset Locations.
- Click New and enter a Location Name and unique Location Code (e.g., HQ-NYC).
- Select the Location Type (Office, Warehouse, Retail Store, Factory, Remote, or Other).
- Set a Parent Location if this is a sub-location (e.g., Room 301 under Floor 3).
- Enter the address and optional GPS coordinates for field teams.
- Set Capacity (maximum number of assets) and choose Allowed Asset Types if only certain equipment may be stored here.
- Assign a Location Manager and save. Assign assets to this location from the asset form.
Fields Table
| Field Name | Description | Example |
|---|---|---|
Location Name |
Human-readable name for the place. |
HQ – Floor 3 |
Location Code |
Short unique code for reports and labels. |
HQ-F3 |
Parent Location |
Higher-level location in the hierarchy. |
HQ Building |
Location Type |
Kind of site: office, warehouse, etc. |
Office |
Capacity |
Maximum assets allowed at this location. |
50 |
Current Assets |
How many assets are here now (auto-calculated). |
38 |
Allowed Asset Types |
Which asset categories may be stored here. |
IT Equipment, Furniture |
Location Manager |
Person responsible for this site. |
Jane Smith |
Status |
Active or inactive location. |
Active |
Field Explanations
Location Name
Use names your staff already use in conversation – “Chicago Warehouse” not “LOC-0042”.
Location Code
Keep codes short and consistent. They appear in exports and barcode systems.
Parent Location
Build top-down: create the building first, then floors, then rooms.
Location Type
Helps filter reports – e.g., show all warehouse assets across the company.
Capacity
Prevents overcrowding. The system blocks assignment when capacity is full.
Current Assets
Watch this number during audits. It should match a physical count.
Allowed Asset Types
Useful for specialized storage – e.g., only vehicles in the parking garage location.
Location Manager
Gets notified about capacity issues and allocation problems at their site.
Status
Set to Inactive when a site closes instead of deleting it – history is preserved.
Tips (Pro Tips)
- Build your hierarchy before mass-importing assets – fixing locations later is tedious.
- Use capacity limits on small storage rooms to prevent clutter and lost equipment.
- Add GPS coordinates for remote sites so field technicians can navigate easily.
Common Mistakes
- Creating flat locations with no parent – you lose the ability to roll up counts by building or region.
- Setting capacity to zero or leaving it blank when you actually need a limit.
- Deleting locations that still have assets assigned – deactivate instead.
Visual Reference