Overview
Asset Management Pro helps your company track every physical asset – laptops, vehicles, machinery, furniture, and more – from the day you buy them until they are retired. It works inside Odoo under the Assets app and adds visual kanban boards, location tracking, maintenance schedules, budgets, and approval workflows.
You do not need technical skills. If you can use email and spreadsheets, you can use this app. Your administrator installs the module and assigns you the right access level (User, Manager, or Scanner).
How It Works
After installation, open Odoo and click Assets in the main menu. You will see the standard asset list plus a section called Asset Pro with sub-menus for Operations, Maintenance, Workflows, Budget, Reports, and Configuration.
Every asset record stores key details: name, type, purchase value, current location, assigned employee, warranty date, and photo. Changes are logged automatically so managers can see who did what and when.
- Asset Pro > Operations – Kanban board, transfers, analytics dashboard
- Asset Pro > Maintenance – Schedules and reusable templates
- Asset Pro > Workflows – Approval rules and pending requests
- Asset Pro > Configuration – Locations, asset types, settings
Step-by-Step Guide
Confirm access.
If you are the person installing the system, follow Installing & Setting Up Asset Management Pro first. Otherwise, ask your Odoo administrator to install Asset Management (base) and Asset Management Pro and to give you the Asset Pro User or Manager role.
Set up asset types.
Go to Assets > Configuration > Asset Types. Create categories such as IT Equipment, Vehicles, or Furniture.
Create locations.
Open Asset Pro > Configuration > Asset Locations and add your buildings, floors, or warehouses.
Register your first asset.
Go to Assets > Assets, click New, fill in name, type, purchase price, and location, then save.
Explore the Kanban board.
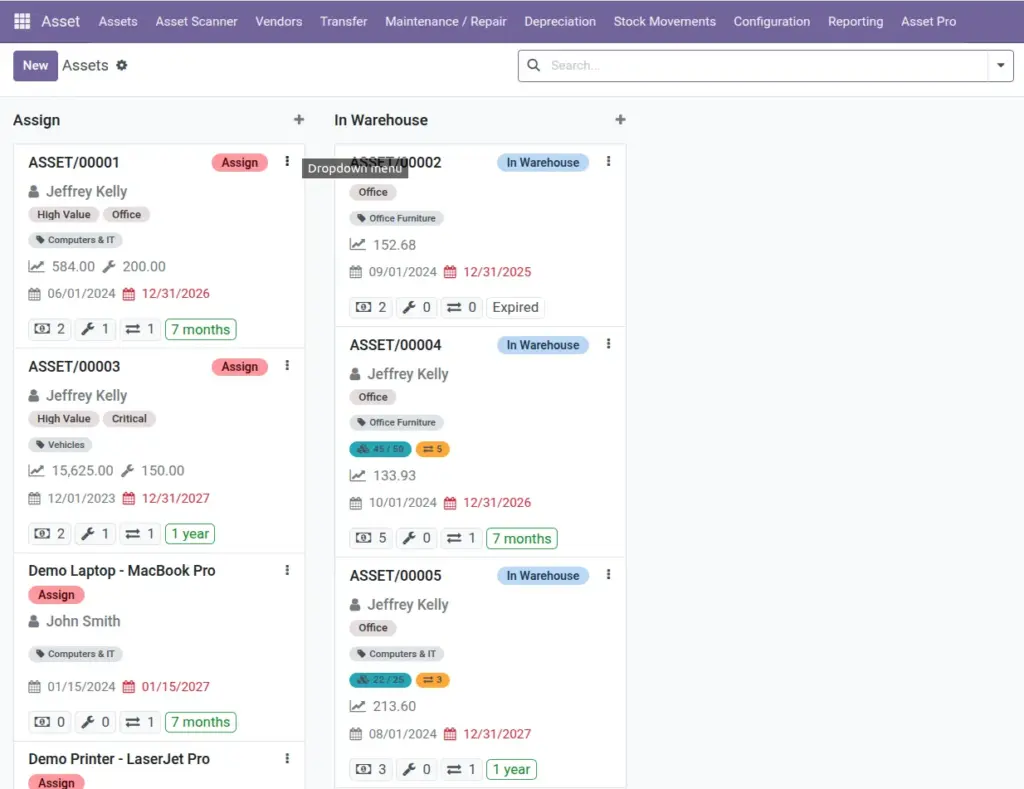
Open Asset Pro > Operations > Asset Kanban Board to see assets as visual cards with photos.
Review settings.
Managers should open Asset Pro > Configuration > Settings to set default depreciation rates and notifications.
Fields Table
| Field Name | Description | Example |
|---|---|---|
Asset Name |
Display name shown on lists and kanban cards. |
Dell Laptop #1042 |
Asset Type |
Category that controls depreciation and custom fields. |
IT Equipment |
Company |
Legal entity that owns this asset. |
Acme Corp USA |
Location |
Physical place where the asset is stored or used. |
HQ – Floor 3 – Room 301 |
Assigned To |
Employee currently responsible for the asset. |
Sarah Johnson |
Purchase Amount |
Original cost when the asset was acquired. |
$1,200.00 |
Current Value |
Book value after depreciation. |
$840.00 |
Status |
Current state: In Warehouse, Assigned, Repair, etc. |
Assigned |
Warranty Expiry Date |
When manufacturer or vendor warranty ends. |
2027-06-15 |
Asset Image |
Photo for quick visual identification. |
Photo of laptop |
Field Explanations
Asset Name
Choose a name your team recognizes instantly. Many companies use a product name plus an internal number like LAP-001.
Asset Type
The most important choice when creating an asset. It determines how value decreases over time and which extra fields appear.
Company
In multi-company setups, each asset belongs to one company. Users only see assets for companies they can access.
Location
Tells you where to find the asset physically. Useful for audits and transfers between offices.
Assigned To
Links the asset to a person. When someone leaves, you know exactly what equipment they had.
Purchase Amount
Enter the original invoice amount. This is the starting point for depreciation.
Current Value
Calculated automatically based on depreciation settings. You do not update this manually.
Status
Shows whether the asset is available, in use, being repaired, or disposed.
Warranty Expiry Date
Set a reminder before warranty runs out so you can claim free repairs.
Asset Image
Upload a clear photo. It appears on the kanban board and helps field staff identify equipment quickly.
Tips (Pro Tips)
- Start with a small pilot – register 10–20 assets in one department before rolling out company-wide.
- Use consistent naming (e.g., “LAP-001”, “VEH-012”) so searching and barcode labels stay simple.
- Upload photos early; they make the kanban board far more useful during daily operations.
- Open the built-in Help Guide under Asset Pro > Configuration for in-app walkthroughs.
Common Mistakes
- Skipping asset types and entering assets as “General” – you lose automatic depreciation and custom fields.
- Forgetting to set company on multi-company databases, which hides assets from the wrong users.
- Assigning assets to locations before creating the location hierarchy – build sites first, then rooms.
- Giving every user Manager access – use User for daily staff and Manager only for finance or IT leads.
Visual Reference