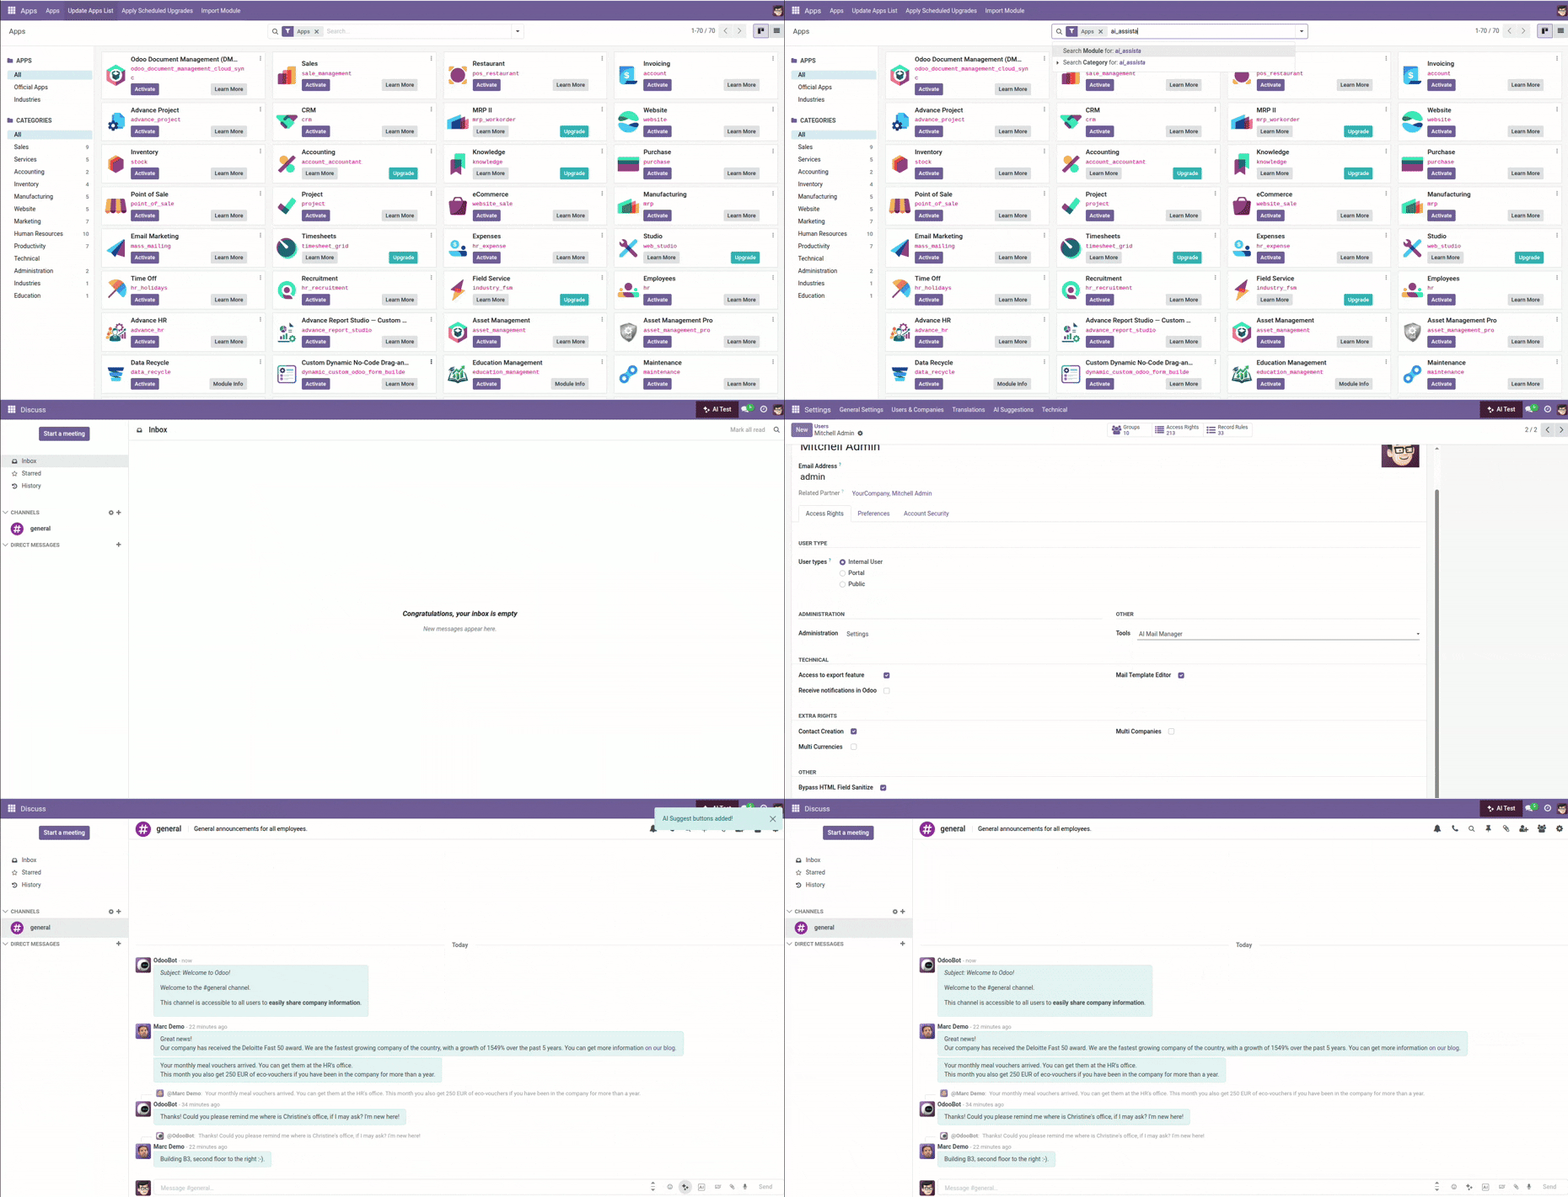
This guide is written for people who are new to Odoo. Follow each step in order. If you are not the server administrator, share this page with the person who manages your Odoo installation—they will handle file placement and restarting the service; you can still read the later steps about turning the app on and checking your own access.
- End users & admins
- Odoo Apps installation
- Permissions & menus
Before you begin
You will need: permission to add files on the Odoo server (or help from IT), access to Apps with rights to install modules, and a few minutes without rushing.
- Download the latest addon package from your vendor or repository.
- Copy the module folder into your Odoo
addonspath (oftencustom_addons). - Restart the Odoo service so the new module is detected.
- Turn on Developer Mode, refresh the app list, then install or activate the module.
- Assign the correct access groups to each user who should see AI features.
- Refresh the browser and confirm menus and buttons appear.
Download the latest copy of the addon
Always start from a current build of the module. Older zip files may miss bug fixes or compatibility updates for your Odoo version.
Download the addon the way your organization provides it: for example a .zip from your partner, a release from a download portal, or a folder copied from version control. If the download is a zip archive, extract it on your computer first. You should see a single top-level folder whose name matches the technical module name (for example the folder that contains __manifest__.py and __init__.py).
Tip for beginners: Keep the folder name unchanged unless your administrator asks you to rename it. Renaming can break references if other custom modules depend on this one.
Upload the addon folder into Odoo’s addons directory
Odoo only loads modules that live in an addons path configured on the server. Many teams use the main addons folder that ships with Odoo, or—more commonly—a separate folder such as custom_addons for third-party and in-house modules.
Copy the entire module folder (the one that directly contains __manifest__.py) into that directory. Do not place the module inside another unrelated module’s folder, and avoid duplicating nested folders (a common mistake is custom_addons/my_module/my_module/__manifest__.py—there should be only one module root).
If you use Odoo.sh or a managed host, use their file manager, Git integration, or support ticket to deploy the folder according to their rules. If you self-host, use SFTP, a shared drive, or direct server access as your IT team prefers.
Why this step matters: Until the files are in a configured addons path, Odoo cannot see the module at all—so it will never appear in the Apps list, no matter how many times you click “Update Apps List.”
Restart the Odoo service
After new Python or XML files are added on disk, Odoo must be restarted so it rescans the addons paths and loads the new module definition safely.
- Linux (systemd): Your administrator may run something like
sudo systemctl restart odoo(the service name can differ). - Windows: Restart the Odoo service from Services, or stop and start the process your team uses for development.
- Docker: Recreate or restart the Odoo container after the volume includes the new folder.
If you are not sure how your company restarts Odoo, ask the same person who applies server updates. Skipping this step is a frequent reason new modules do not show up.
Activate Developer Mode in Settings
Developer Mode unlocks extra technical menus and options in Odoo. For installing and updating apps, it is often required or strongly recommended so you can use Update Apps List and see more detail when something goes wrong.
To turn it on: open Settings, scroll to the bottom of the page, and use the link to Activate the developer mode (wording can vary slightly by Odoo version). Some databases show a small “bug” icon in the header after activation.
If your organization restricts Developer Mode, ask an administrator to either enable it temporarily or to run Update Apps List for you from a privileged session.
Update the Apps list
Open the Apps menu. Remove the default “Apps” filter if it hides modules that are not marked as official, then open the menu (often three dots or a dropdown) and choose Update Apps List. Confirm the dialog.
Odoo will rescan the addons paths and register any new modules. Wait until the operation finishes; on large servers this can take a short while.
If the module still does not appear, double-check Steps 2 and 3: folder location, correct addons path in the Odoo configuration, and a successful restart.
Search for the addon in Apps and activate it
In Apps, clear any search filters that might limit results, then search by the module’s display name or technical name (your vendor documentation will list both).
Click the module card, then press Activate or Install (the label depends on Odoo version and whether the module was partially installed before). The database will load Python code, views, security rules, and data files defined by the module.
Leave the tab open until the progress completes. If you see an error, copy the message for your administrator—it usually points to a missing dependency, a conflicting module, or a version mismatch.
Demo data (if the addon includes it)
Some modules ship with demonstration data: sample records that help you explore features in a test database. Whether demo data loads depends on how the database was created (for example “Load demonstration data” checked when the database was first created) and how the module defines its demo XML.
- Training or sandbox: Demo data can be useful to learn quickly.
- Production: Most companies avoid loading demo data on live systems so customer and financial records stay clean.
You do not need demo data for the AI Assistant to work; it only helps visualization in some setups. If demo records appear and you do not want them, your administrator can remove them using standard Odoo data management practices.
Give users permission to access the application
Installing the module enables it for the database, but each person still needs the right access rights (security groups). Without them, users will not see the AI menus or actions even though the module is installed.
Go to Settings → Users & Companies → Users, open the user who should use the AI features, and switch to the Access Rights tab (in some versions, group membership appears under a similar name).
For this product, assign at least AI Mail User to anyone who should use AI in chatter, email, and related tools. Assign AI Mail Manager to administrators who will configure providers, prompts, and policies—managers automatically include user-level access.
Groups are usually listed under a category such as Tools or Other Extra Rights, depending on your Odoo version and translation. Save the user form after every change.
Good practice: Start with a small pilot group (one or two trusted users), confirm everything works, then roll out to the wider team. That makes support easier if a key or network setting still needs adjustment.
Refresh Odoo and confirm you see the facility
Ask each user to sign out and sign in again, or at minimum perform a full page refresh (Ctrl+F5 on Windows, or Cmd+Shift+R on macOS) so the browser loads the new menus and assets.
Users with AI Mail User should see the AI Suggestions area under the administration/settings side of the menu (exact placement follows your Odoo version and other installed apps). In day-to-day work, AI actions appear in mail composers and chatter where your organization enabled them.
If the module is installed but a user still sees nothing, revisit Step 8 for that user’s login, and confirm you are not using a different database or company in the URL.
Tips
- Match Odoo versions. Use a module build that your vendor states is compatible with your major Odoo version (for example 17.x). Mixing versions often causes silent failures or install errors.
- One database at a time. After install, confirm you are on the same database where you activated the app; bookmarks and multi-tab work can point at a test DB by mistake.
- Keep a short install log. Note the module technical name, install date, and who restarted the server. That saves time when someone asks “what changed?” months later.
- Update Apps List after every server-side change. Any time you add, remove, or replace a folder under an addons path, restart Odoo and run Update Apps List again before declaring it missing.
- Plan provider keys before go-live. Installation is only half the job; an administrator still needs API credentials under Settings (see Settings & Providers) before users get useful AI replies.
- Use a sandbox first. If you have a copy of production, install and assign roles there first—you learn the flow without risk to live data.
Common mistakes
- Wrong folder depth. Uploading the zip’s outer wrapper so that
__manifest__.pyis too deep (or duplicated) prevents Odoo from recognizing the module. - Wrong addons path. Files copied to a directory that is not listed in the Odoo configuration’s
addons_pathwill never appear in Apps. - No restart after copying files. Clicking Update Apps List alone does not replace a proper service restart when new modules were added on disk.
- “Apps” filter hiding custom modules. Leaving the default filter on can make it look like the module vanished even though it installed correctly—clear filters and search again.
- Forgetting access groups. The module is installed but regular users see no AI menus or buttons until AI Mail User (or AI Mail Manager) is assigned.
- Editing the live database without a backup. Always take a backup before installing new apps on production, especially if dependencies might upgrade other modules.
- Installing on production during peak hours. Large modules can lock tables briefly; schedule off-peak windows when possible.
- Assuming demo data means “broken.” Sample records are optional; their absence does not mean the install failed.
Image