Overview
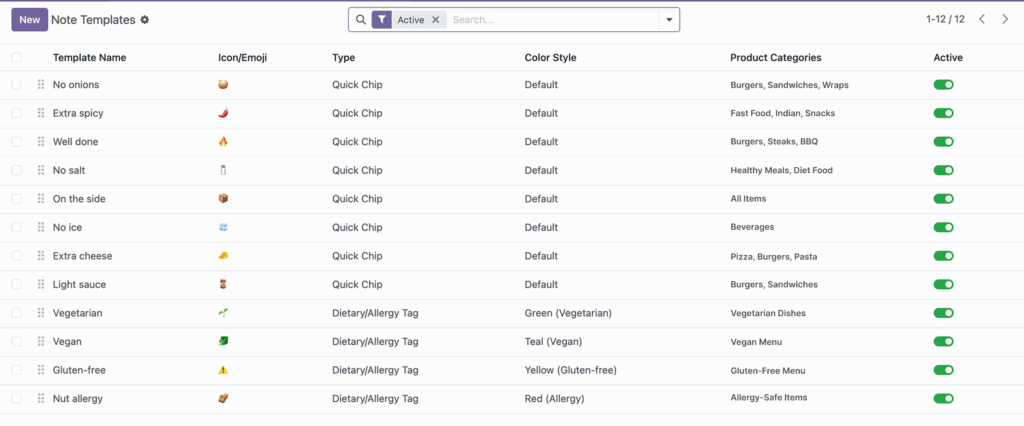
Category-based visibility controls which note options appear for which products. This keeps the customer screen clean and relevant, because people only see notes that make sense for the item they selected.
For example, “No ice” is useful for drinks but not for hot food, while “Well done” is useful for mains but not for desserts. By setting category rules, you reduce unnecessary choices, speed up ordering, and avoid confusing requests.
How It Works
In each note template, you can select one or more product categories. If left empty, the template is shown for all products. This lets you choose between global notes and category-specific notes.
Step-by-Step Guide
- Open an existing template or create a new one.
- Go to Product Categories.
- Select category tags where this note should appear.
- Leave categories empty if you want the note available everywhere.
- Save and test with products from different categories.
Fields Table
| Field Name | Description | Example |
|---|---|---|
Product Categories |
Limits where the note template appears. |
Beverages, Pizza |
Template Name |
Instruction shown when category rule matches. |
No ice |
Type |
Quick chip or dietary tag display style. |
Quick Chip |
Active |
Enables category-linked template for customers. |
Enabled |
Fields Explanation
Product Categories
This is the main control for targeted visibility.
Template Name
Should match the product context where it appears.
Type
Use quick chips for normal preferences and dietary tags for restrictions.
Active
Category rules work only when the template is active.
Tips
- Start with global templates, then narrow only when needed.
- Review categories each time you add new product groups.
- Use customer ordering reports to identify missing category notes.
Common Mistakes
- Assigning too many categories, making the setup hard to maintain.
- Forgetting category mapping after menu redesign.
- Leaving all templates global, resulting in a crowded cart interface.
Image