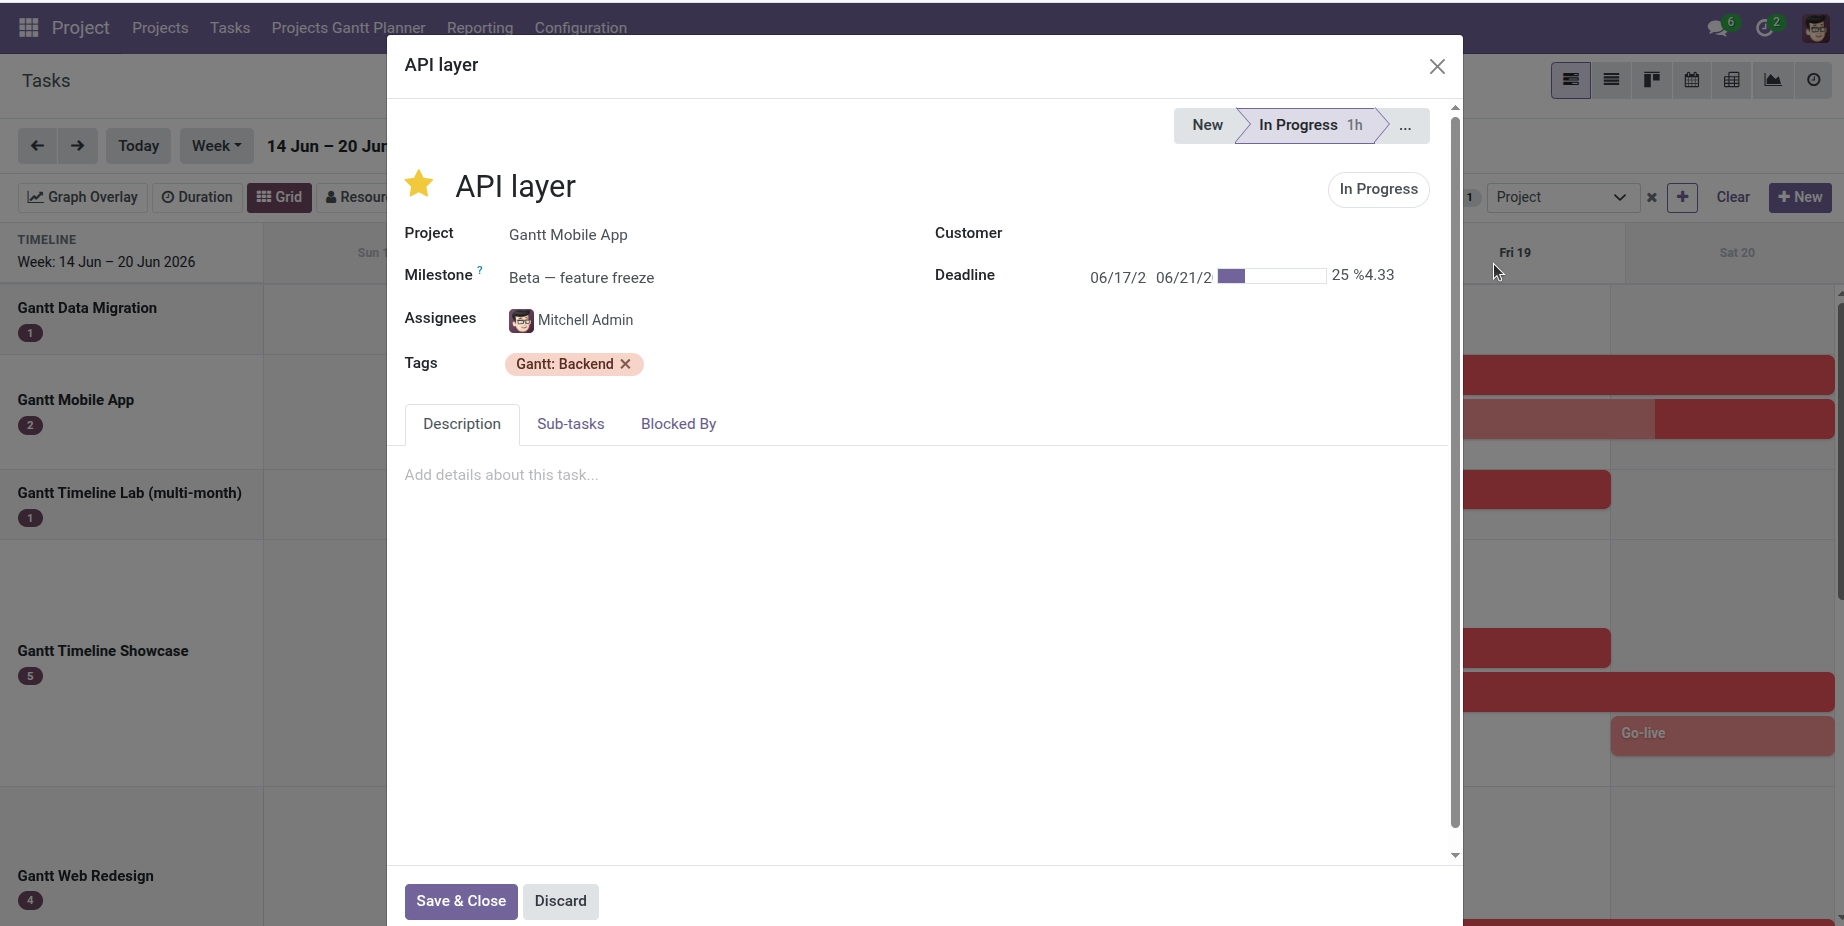
How Planned Start and Planned End get on your tasks – manually or automatically.
Overview
Every bar on the Gantt chart represents a time range: when work starts and when it should finish. These are stored as Planned Start and Planned End on each task. You can type them on the task form, or let Odoo suggest values from deadlines and allocated hours.
How It Works
When you create a new task, the system tries to fill in missing planned dates:
- Planned Start defaults to the assignment date, or today if neither is set
- Planned End defaults to the deadline, or start plus allocated hours, or start plus one day
The end date must always be after the start date (at least one hour apart). If you enter invalid dates, Odoo corrects them automatically.
On the task form, you’ll find these fields right after Deadline. When you drag a task on the Gantt, the planned dates update – and the deadline may also update to match the new end date.
Step-by-Step Guide
- Open a task from Project → Tasks or by clicking a bar on the Gantt.
- Scroll to the date section and find Planned Start and Planned End below the Deadline field.
- Pick a start date and time when work should begin.
- Pick an end date and time when work should be complete.
- Save the task. Return to the Gantt view – the bar appears in the correct position.
- Shortcut: Instead of typing dates, create the task with a Deadline and Allocated Hours – planned dates often fill in on their own.
Fields Table
| Field Name | Description | Example |
|---|---|---|
Planned Start |
Scheduled beginning of the task on the Gantt |
09 Jun 2025 09:00 |
Planned End |
Scheduled completion of the task on the Gantt |
11 Jun 2025 17:00 |
Deadline |
Official due date; used to suggest planned end |
11 Jun 2025 |
Assignment Date |
When the task was assigned; used to suggest planned start |
09 Jun 2025 |
Allocated Hours |
Expected work hours; used to calculate end from start |
16 hours |
Planned Duration (days) |
Computed length between start and end |
2.33 days |
Field Explanations
Planned Start
The moment work is expected to begin. This anchors the left side of the bar. Changing it shifts the whole task unless you also change the end.
Planned End
When the task should wrap up. This anchors the right side of the bar. Overdue detection uses this date compared to today.
Deadline
The business due date. If you set only a deadline, the Gantt can use it as the planned end. Dragging a bar on the Gantt may update the deadline to stay in sync.
Assignment Date
When someone was assigned the task. If planned start is empty at creation, this date (or today) becomes the start.
Allocated Hours
How many hours of work the task needs. With a start date but no end, the system adds these hours to calculate planned end.
Planned Duration (days)
Read-only field showing how many days the bar spans. Useful for reporting without opening the chart.
Tips
- Set Deadline and Allocated Hours first on new tasks – planned dates often appear without extra typing.
- Use the Has Planned Dates search filter to find tasks still missing a schedule.
Common Mistakes
- Confusing Deadline with Planned End Deadline is the due date for the business; Planned End is what the Gantt bar shows. They often match but can differ if you reschedule on the chart.
- Same start and end time The system requires at least one hour between start and end. Very short tasks still need a minimal duration.
- Only setting dates on parent tasks Sub-tasks need their own planned dates to appear as separate bars unless you open the sub-task Gantt from the parent.
Image