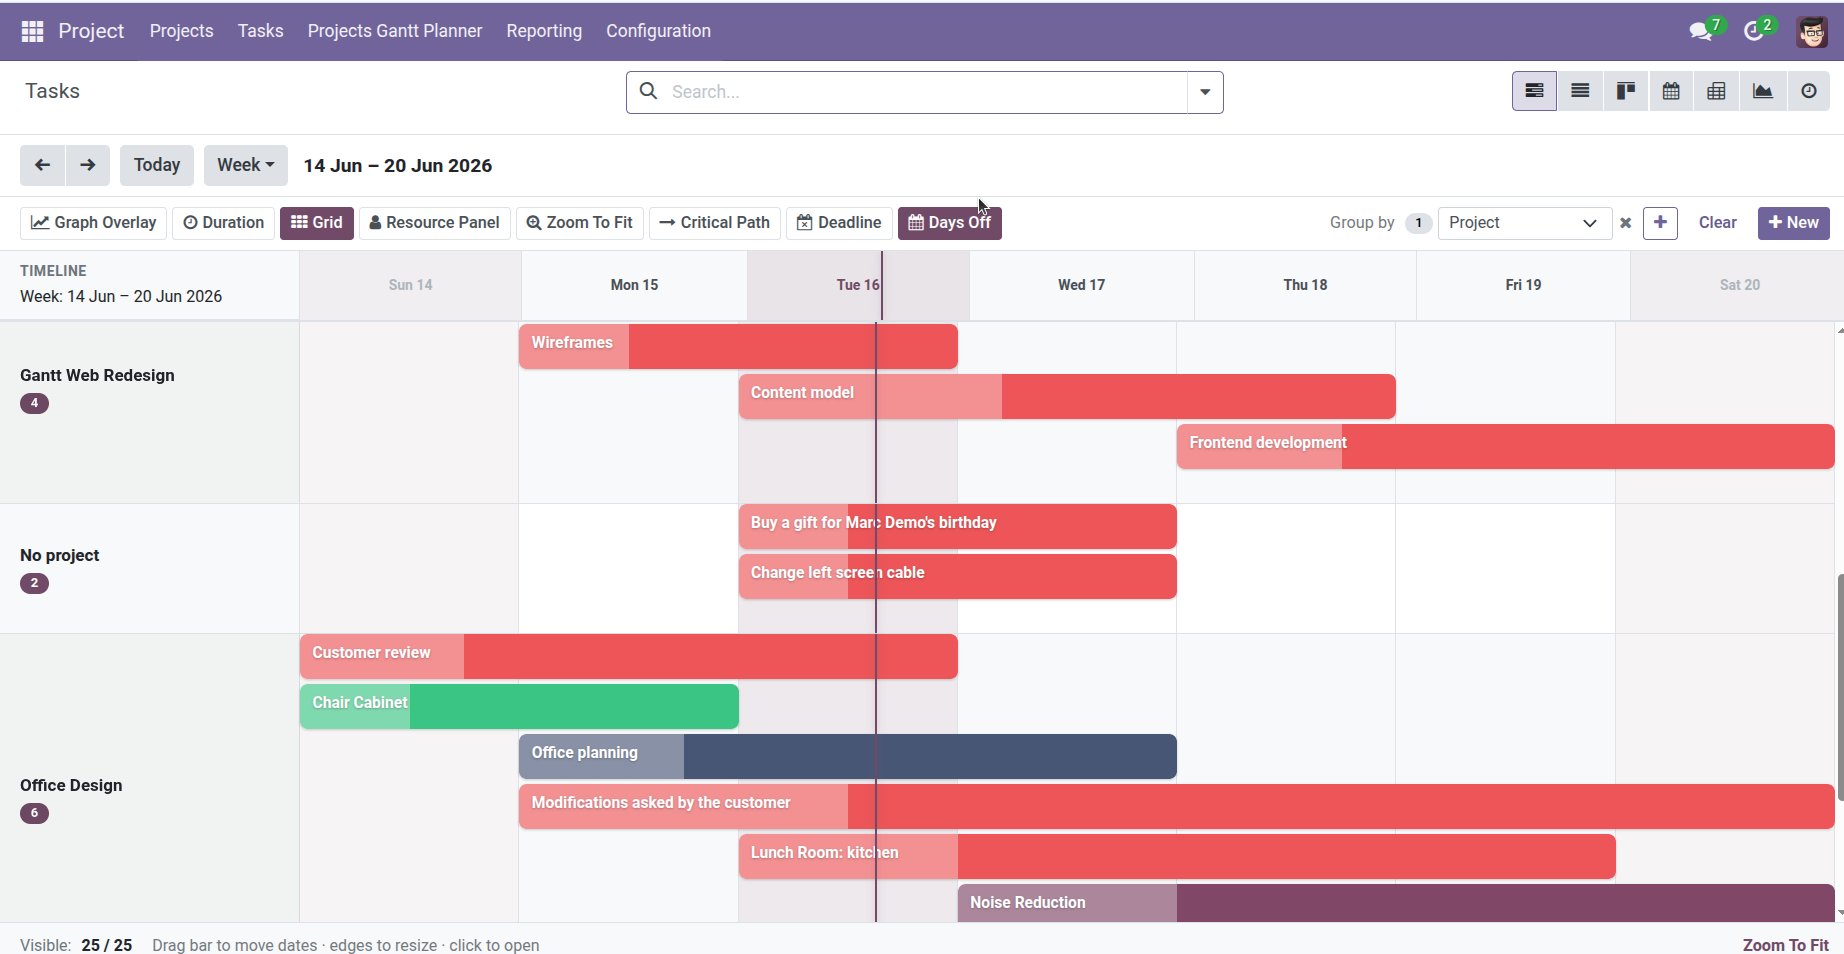
Use the “By Project” view to compare schedules across your portfolio.
Overview
The By Project menu opens the task Gantt with every project as its own row. All tasks for “Website Redesign” sit on that row’s timeline; all tasks for “Office Move” sit on the next. It’s the fastest way to compare how different projects overlap in time.
How It Works
This view is the same Tasks Gantt, but with Group by → Project applied automatically. Only tasks linked to a project and marked to display in the project are shown.
Each left-hand row shows the project name and a count badge (how many tasks). Multiple task bars can appear on the same row – they may stack in lanes if they overlap.
You can still use all toolbar features: drag tasks, toggle deadlines, zoom, and add extra grouping levels (e.g., Project → Assignee).
Step-by-Step Guide
- Go to Project → Projects Gantt Planner → By Project.
- Scan each project row – bars show when that project’s tasks run.
- Click a bar to open and edit that task.
- Drag bars to shift work within a project without leaving the portfolio view.
- Use the search bar to narrow to specific projects, customers, or assignees.
- Enable Graph Overlay to see each project’s average progress in the sidebar.
- Switch to month scale for a quarterly portfolio review.
Fields Table
| Field Name | Description | Example |
|---|---|---|
Project |
Groups all tasks on one Gantt row |
CRM Implementation |
Display in Project |
Task must be enabled to appear in project views |
Checked |
Task Count Badge |
Number of tasks on each project row |
8 |
Customer |
Project’s customer – filter in search to focus one client |
Acme Corp |
Group by Project |
Automatic grouping in this menu |
Level 1 = Project |
Field Explanations
Project
The container for related tasks. In By Project view, each project gets one sidebar row with all its task bars to the right.
Display in Project
Sub-tasks or internal items can be hidden from the main project. Hidden tasks won’t appear on that project’s row.
Task Count Badge
Quick indicator of how many scheduled tasks each project has in the current filter.
Customer
The client linked to the project. Filter by customer when preparing a client status report.
Group by Project
The preset that makes this menu different from the plain Tasks entry – same chart, organized by project from the start.
Tips
- Use By Project in monthly steering meetings – leadership sees all initiatives on one screen.
- If a project row looks empty, check that its tasks have planned dates and aren’t hidden from the project.
Common Mistakes
- Tasks without a project This view hides tasks not linked to any project. Assign a project or use the main Tasks Gantt instead.
- Overlapping bars look messy Add a second group level by Assignee or zoom to week view for detail.
Image