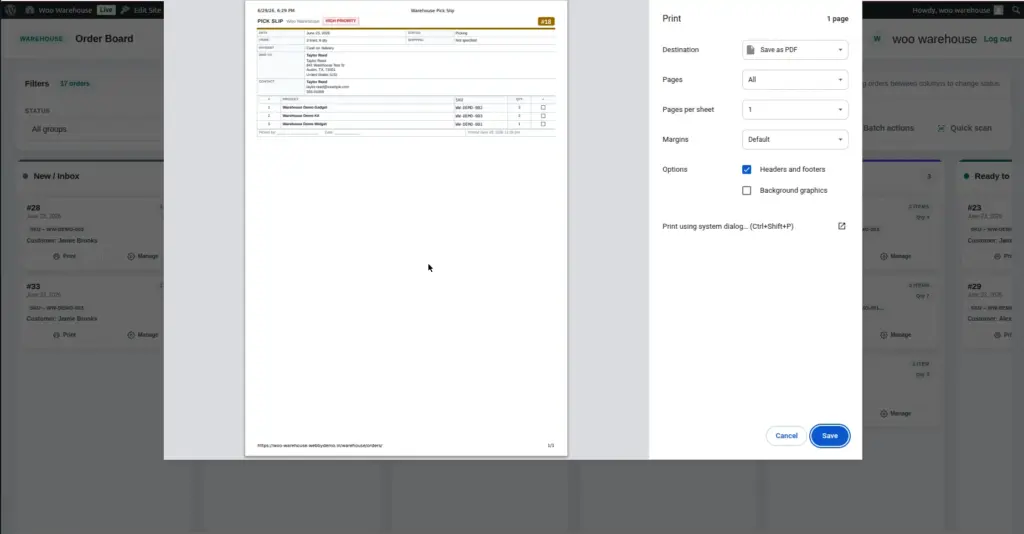
A print slip is a paper document printed for each order that goes to the warehouse floor with the picker. It lists all the items in the order, their bin locations, quantities, and the customer’s shipping address – everything a picker needs to collect and pack the order correctly.
What Is a Print Slip and Why Use One?
Even in digital warehouses with tablets and barcode scanners, a printed slip is still valuable. It travels with the picker through the warehouse aisles, gets physically checked off as items are collected, and goes into the box with the parcel as a packing confirmation for the customer.
The print slip includes:
- Order number and order date
- Customer name and shipping address
- All line items – product name, SKU, quantity ordered
- Bin location for each item (where to find it in the warehouse)
- Order notes (any special instructions from the customer)
How to Print a Slip
1. Open the order detail panel
On the Order Board, click any order card to open its detail panel.
2. Click the "Print Slip" button
In the order detail panel, find and click the “Print Slip” button (it usually has a printer icon). This opens a new browser tab or window with the print-optimised slip layout.
3. Use your browser's print function to print
In the new tab with the slip, press Ctrl+P (Windows) or Cmd+P (Mac) to open the print dialog. Alternatively, click the browser’s menu and select “Print.” Choose your printer, set the page to A4 or Letter size, and click Print.
4. Give the printed slip to the picker
Hand the printed slip to the picker assigned to that order. They take it to the warehouse floor, collect all items from the listed bin locations, tick off each item, and place the slip inside the box when packing.
What Is Printed on the Slip
| Slip Element | Details | Why It's Useful |
|---|---|---|
Order Number & Date |
The WooCommerce order number (e.g., #1042) and the date it was placed. |
Allows staff to cross-reference the slip with the digital order on the board. |
Customer Name |
The customer’s billing or shipping name. |
Confirms who the order is for when packing multiple orders simultaneously. |
Shipping Address |
Full shipping address including city, postcode, and country. |
Allows the packing team to verify the address before attaching a shipping label. |
Product List |
Each item in the order: product name, SKU, and quantity ordered. |
Gives the picker a checklist of every item to collect. |
Bin Location |
The bin location for each product (if set on the product’s Inventory tab). |
Guides the picker directly to the correct shelf without searching — the most time-saving element on the slip. |
Order Notes |
Any notes the customer entered at checkout, or notes added by the store admin. |
Ensures special instructions (gift wrapping, fragile items, specific packaging) are not missed. |
Picker / Assignee Name |
The name of the warehouse staff member assigned to this order. |
Creates a clear paper trail – if a packing mistake occurs, the slip identifies who was responsible. |
Tips for Using Print Slips
- Add bin locations to all products before printing slips – a slip without bin locations just shows item names, forcing pickers to search the warehouse. Bin locations on slips dramatically reduce picking time.
- Print slips at the start of each shift for all orders in “Pending Pick,” so each picker has their slips ready before they start walking the warehouse.
- Place the print slip inside the box with the order when packing. Many customers appreciate seeing a packing list with their order, and it confirms the right items were sent.
- If your warehouse uses a thermal label printer (like a Zebra printer for shipping labels), note that print slips are designed for standard office printers (A4/Letter). They are not formatted for narrow thermal label rolls.
- If the browser print dialog shows too many margins or headers, go into your browser’s print settings and set margins to “None” or “Minimum” for a cleaner slip layout.
You’ve Completed the Documentation
You have read through all 12 chapters of the Woo Warehouse documentation. Your warehouse team now has everything they need to:
- Install and set up the plugin from scratch
- Use the Kanban order board to manage daily fulfilment
- Create and customise workflow statuses
- Assign orders to individual pickers
- Set up bin locations for faster picking
- Use barcode scanning to instantly pull up orders
- Record shipping carrier and tracking numbers
- Manage the completed orders archive
- Set up staff accounts with the right permissions
- Receive automatic email notifications
- Configure all plugin settings
- Print picking and packing slips
If you have questions or need support, visit Warehouse → Help in your WordPress admin for built-in guidance, or contact Webbycrown Support.
Image