This chapter shows what each menu does in simple terms, so you always know where to go for your task.
Overview
The module adds a main top‑level menu called Asset. Inside it you’ll find daily work menus (Assets, Transfer, Maintenance/Repair, Depreciation), plus reporting and configuration items.
Tip: If you can’t see a menu, it may be due to your access role (User vs Administrator).
How it works
Think of the app as one “asset record” with several connected logs:
- Transfers answer “who has it now?”
- Maintenance answers “what service happened and what did it cost?”
- Depreciation answers “what is the current book value?”
- Reports help you review trends and history
Step-by-step guide
I want to create or update an asset
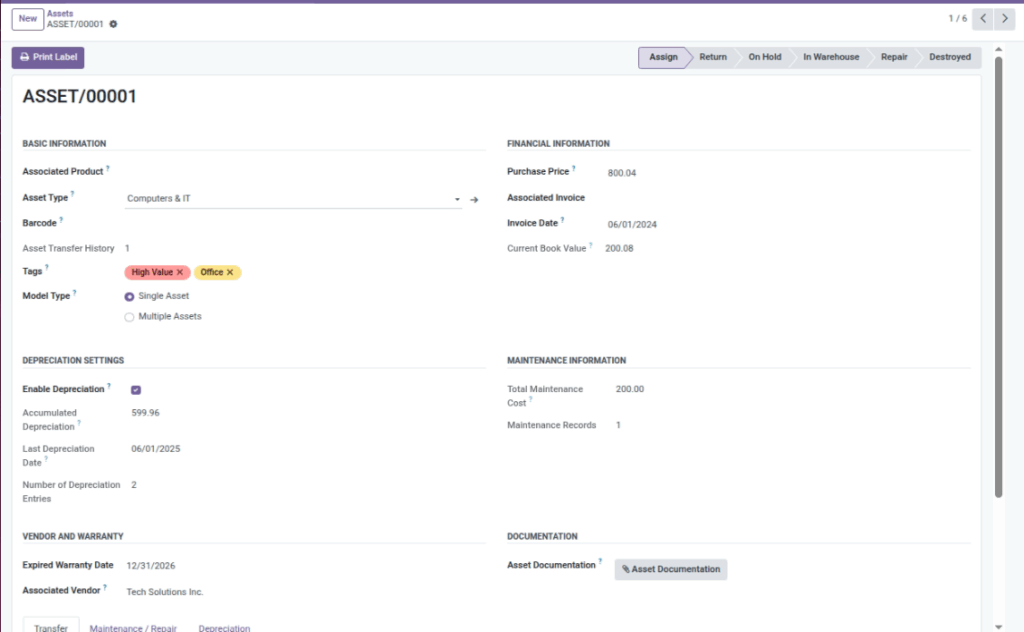
Go to Asset → Assets. Open an asset to edit details like purchase price, warranty, vendor, documents, and status.
I want to assign an asset to an employee
Go to Asset → Transfer (or open the asset and use the Transfer tab). Add an entry with status Assigned.
I want to mark a return
Go to Asset → Transfer. Update the transfer entry with a Return Date and set status to Returned.
I want to log a repair invoice / service proof
Go to Asset → Maintenance / Repair. Add a record with vendor, dates, status, amount, and attach the document.
I want depreciation entries (book value)
Go to Asset → Depreciation to review entries. Depreciation is generated automatically for assets with depreciation enabled.
I want to print barcode labels
Go to Asset → Assets, select one or more assets, then use Print Labels (or open one asset and click Print Label).
Fields table
| Menu | What it’s for | Example |
|---|---|---|
Asset → Assets |
Your main asset list (unique items and stock‑managed items). |
“Laptop ASSET/00001”, “Office Chairs (50 units)” |
Asset → Vendors |
Supplier/service partners and their contact details. |
“Tech Solutions Inc.” |
Asset → Transfer |
Assignment and return history (who had what, when). |
Assign 5 chairs to a new joiner batch |
Asset → Maintenance / Repair |
Service records, costs, and attached documents. |
Vehicle service invoice for $150 |
Asset → Depreciation |
Depreciation entries generated over time. |
Monthly depreciation entry for a laptop |
Asset → Stock Movements |
Assignment/return timeline for stock‑managed (“Multiple”) assets. |
See how many monitors were assigned last month |
Asset → Reporting |
Charts for quick insights (types, vendors, status, costs). |
Pie chart of assets by vendor |
Asset → Configuration |
Set up Types and Tags used across assets. |
Type “Computers & IT” with yearly depreciation rules |
Field explanations
| Field Name | Explanation |
|---|---|
Status |
The lifecycle stage for the asset (Assigned, Returned, In Warehouse, Repair, etc.). |
Model Type |
Choose Single Asset for a unique item, or Multiple Assets for items you track in quantities. |
Current Stock |
Only for “Multiple Assets” — how many units are still available to assign right now. |
Tips
- Use Tags to filter quickly (e.g., “Critical”, “High Value”).
- Group By Status to see “what’s in warehouse” vs “assigned” at a glance.
- Add vendors early so you can reuse them in assets and maintenance records.
Common mistakes
- Not choosing the right Model Type: if you need quantities, use “Multiple Assets”.
- Forgetting return dates: the history becomes unclear, and stock can look wrong.
- Missing warranty date: you’ll lose visibility on what’s about to expire.
Image placeholder